This is a bit of a surprise - 18 months after I sold the car, I'm still updating the web site! I've been asked a few times about how I made the cycle wing brackets for my Locust.
Well, the first thing is that it was actually a mate of mine who did the work while I helped - however, I do remember what we did. Unfortunately, as I don't have the car, I can't measure anything - although the size of the materials I'm sure about.
I used 25mm CDS tubing that was left over from the rear 4-bar suspension (the walls were about 6mm thick - but this is a lot of an overkill for this).
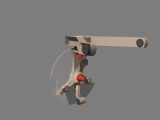
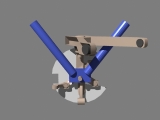
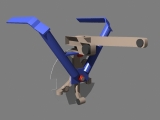
This is a rough model of the Triumph hub - it's not perfect, but it's good enough for this web page. (Click on a picture to open a larger version)
You will need to remove the nuts and washers, coloured red in the above picture.
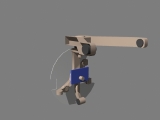
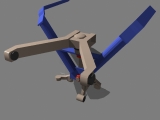
Cut a plate to the rough size below - height is probably about 50mm, and width 75mm. Drill a hole to the right size towards the bottom (from memory, it's around 12mm).
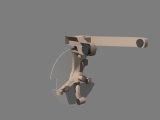
Put the central nut back on (I've omitted this from the next few pictures).
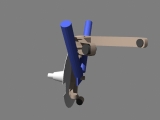
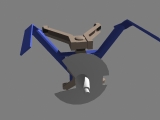
Next, cut two lengths of the circular rod to over the size you need. Cut 4mm slots in the bottom, but do not weld yet. Slot them into place.
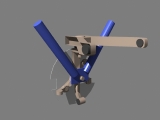
The reason why you don't weld it yet is because you need to make sure it can turn all the way around without touching the top wishbone. It's an idea to do this with the normal weight of the car on the wheel if you can.
When you know where to place them, weld them into place.
Next, shape some of the flat bar to follow most of the curve of the wing, and also go over the rods. You will need to decide at this point what length the rods will be, and cut them to that size. Weld them very thoroughly to the rods.
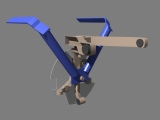
The final touch is to weld a bar across the two rods that is bolted to the top wishbone's mounting bolt. This will give significantly more stability than leaving them loose.
Remove all the new steel, and then paint or powder coat it.
You can now put the nuts back on, and then put the cycle wings back. Note that you probably won't have enough thread to put the washers back on though.

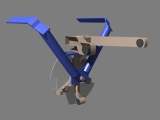
It's a shame I didn't realise that what we were doing was so special - otherwise I would've taken some pictures explicitly of this. Anyway, this is the best picture:
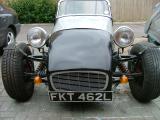
I've also noticed that on that picture, there's an additional small bar towards the centre of the hub between the two rods as extra strengthening.
For the wheels I had, we'd spaced them out by 25mm. This means you may find that the rods may interfere with the wheels - if this is the case, you have three options:
Good luck!